This article will deal mostly with how to get some (relatively) cheap and effective terrain on the table. I’ll also be using some existing terrain sets and showing how I got some more mileage and diversity out of the terrain sets available. Specifically in this article I will be using Games Workshop’s Cities Of Death terrain pieces and the Pegasus Gothic Building set.
I’m pretty lucky because I have a helper when I’m making my terrain
If you don’t have a helper then at least make sure you’ve got a flat area that you can make cuts against and apparently in my house the bathroom counter is NOT that place.
Section 1 - Using Existing Terrain Kits
One method of using the terrain kits is to mix the pieces from different kits together. This won’t really help you get more mileage out of your terrain but it will result in more diverse looking terrain and at least for me I can confuse people into thinking that the finished piece is from a completely different set which in itself makes the whole thing worth it. For my terrain I used 3 different methods of mixing the pieces together:
Vertically Inset
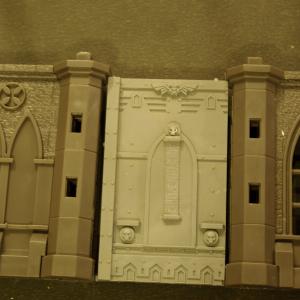
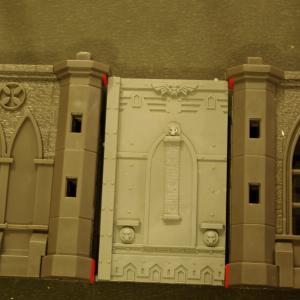
The best way to get the pieces to look like they belong together is to actually make them fit together as though that was the way the kit was designed. Luckily, the Games Workshop pieces will fit into any spot with a right angle since the floor plates are square and the walls will hang slightly over them when attached. So, to get them to fit in flush with the Pegasus pieces all you have to do is cut the top of the pillar sections off in a line matching the wall section as illustrated below.

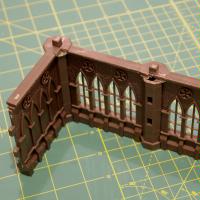
Now the Games Workshop floor plate should fit right in. I also cut off the little pegs on the top of the pillars.
Remember that the Games Workshop pieces will overhang a bit so don’t worry about any sloppiness between the floor plate and the wall. At this point I would damage the wall sections (using a dremel) before attaching them to the bottom level. Next I would dry fit all of the wall sections and then make sure that the point I started cutting the Games Workshop wall section matched the Pegasus lower section. In other words, I would make sure that the floor ran the length of the wall and vice versa. Then, all that remains is to glue the pieces together.
Vertically Stacked
A simpler method is to go with ‘Vertically Stacked.’ To do this I just put a flat piece to be used as the floor over the top of the wall section to make a flat area to attach the wall above it. I used a thin pressboard for mine that is actually the backboard for the Ikea shelve/closet system. Another option would be thick styrene (I recommend “For Sale” signs from Home Depo). I cut the pegs off of the top of the wall sections and glued the floor section down. With the flat floor piece attached the Games Workshop walls can just be glued down flush to it.
For one of my pieces I used Pegasus pieces for the second story walls as well. So unlike the example above I wanted the pegs to help me align the second story wall to the first. To do this I attached the floor as above but let the piece overhang the pillar sections along with cutting little holes for the pegs to poke through.
Then, I went back and cut the piece to match the face of the wall. A knife, clipper, or cutting wheel are the best tools for this.
It wouldn’t look bad to have the lip remain there though so performing that step is based on personal preference…
…but on mine I cut them to match. ...well, at least as close to matching as I can manage.
Horizontally
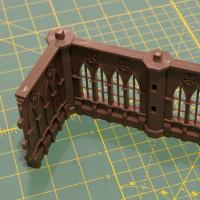
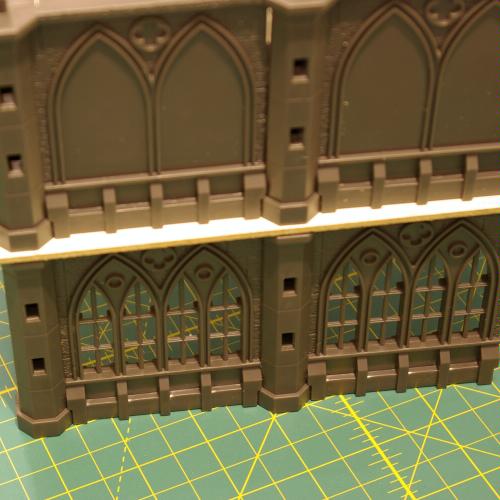
Mixing pieces horizontally can be simpler, or more involved depending on how the piece is to be attached. If the piece is at the end of a wall section it’s no big deal, but if it’s in the middle the height difference will need to be addressed with a spacer to make it taller or by cutting to make it shorter to match. The Games Workshop pieces are just a bit shorter than the Pegasus pieces but as it happens they fit right under the topmost bump out on the pillars.
All I did was cut the bottom bump out and the second to the top one off of the pillar to fit the Games Workshop piece right in.
Section 2 - Building The Cathedral (or Insulation Foam, The Final Frontier!)
This next section is just an example of how I made a particular terrain piece. Hopefully you will find this useful, but if not, then at least I have increased my presence on the internet.
Getting Started
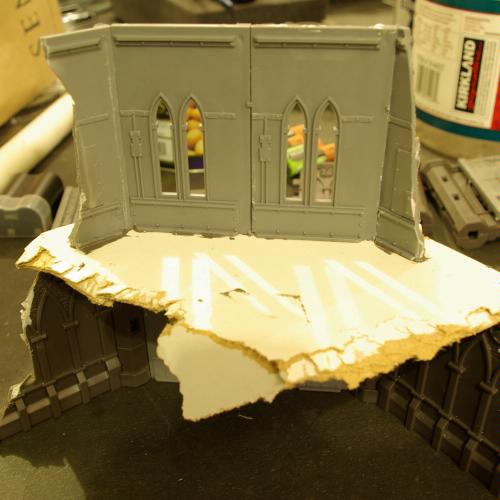
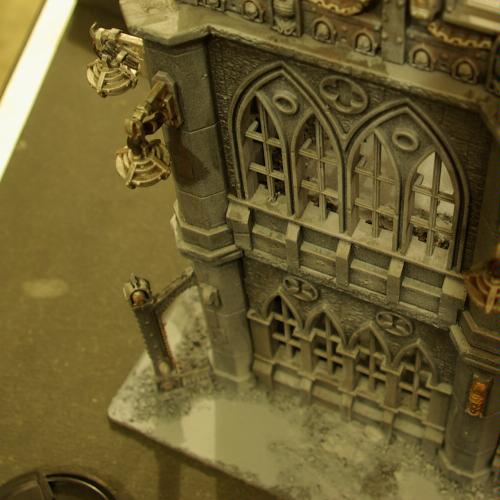
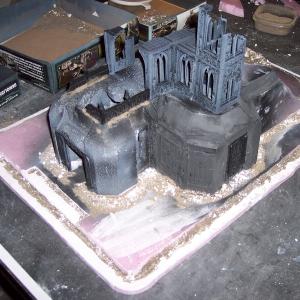
I wanted a large central piece for my ruined city terrain so I decided that I needed some kind of cathedral. I knew I wanted it to be partially destroyed, but I wanted it to still look impressive and be easy to recognize that it had once been a neat looking gothic building. Sorry about these pics. Most of them were taken before I got my new camera.
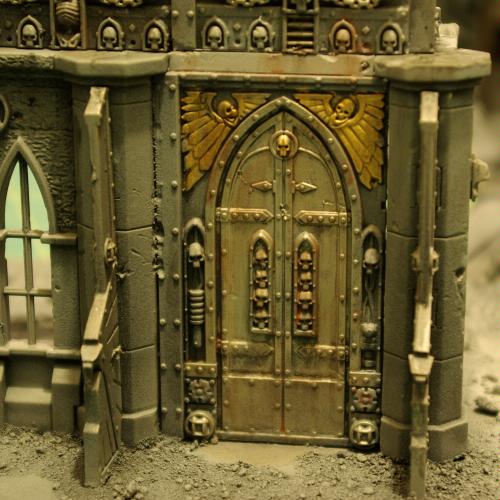
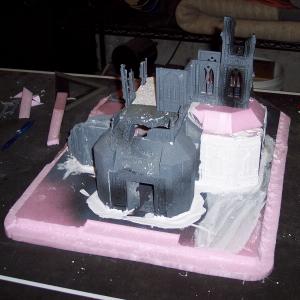
As I do with all of my terrain projects I started with a central piece that sparked my interest and I started positioning it on the table and turning it around until something in my imagination kicked in (not ‘shrooms) and I began to see the rest of it take shape. I used the piece painted gray in the example below, and immediately distressed it a bit and added the GW terrain piece (the double door with the doors removed). Then I sprayed it lightly and I was ready to build up from there.
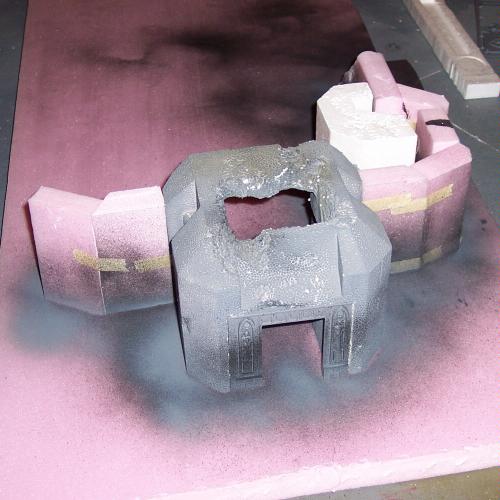
The picture above also shows that I had cut a few other pieces of Styrofoam and taped them together to flesh out the dimensions of the finished piece and make sure everything fit together the way it was supposed to. I then lightly sprayed the bottoms of the pieces so that when I lifted them off there was a nice outline left on the base. That would help me later when I went to attach the pieces permanently.
The Basic Shape
The next step was to get the GW COD pieces on it and see what the vertical dimensions of the piece would look like. I use Silly Putty to hold pieces together temporarily. Sure, some modelers use clay, but clay can’t lift images from Archie comics so it is obviously an inferior material. I also added a door piece to the inside of the building.
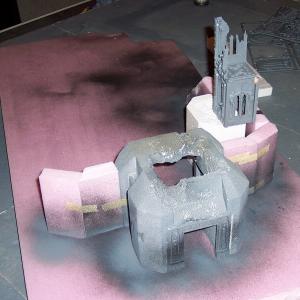
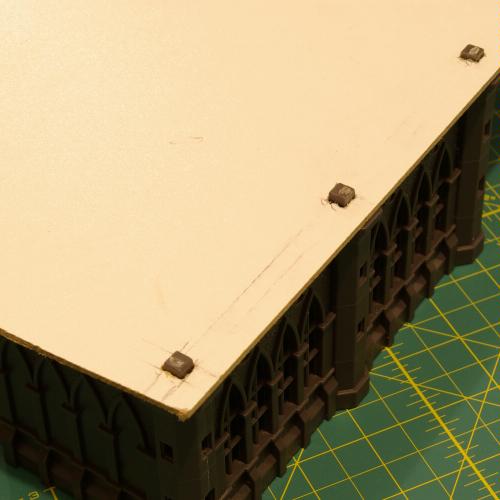
I cut the base to the shape I wanted it and made a few steps in it as well. I find that the best tool for making cuts like this is a serrated kitchen knife. I think it’s meant for cutting bread or something but it works pretty well for this. Just be sure to wash it and put it away before your wife finds out. A Dremel with a cutting wheel works too but I have a hard time keeping the thing straight and it’s probably not healthy to breath in the huge pink cloud that fills the entire area moments after cutting.
Using Plaster Casts on the Walls
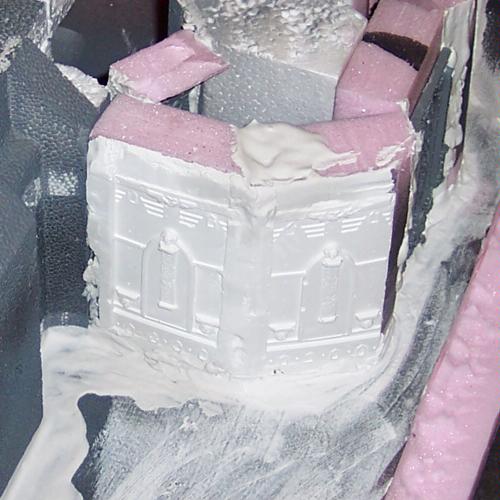
The next step is the most important. I had made some one-sided molds of the GW COD pieces earlier. I use Legos to make the box for my molds (that will come up later). The reason for this was to make the outer Styrofoam walls more interesting looking without actually having to have any modeling skill. The process for this happens a little to quickly to document with photos but I’ll try to explain it as best I can. First, I pour plaster into the mold, then I place the Styrofoam piece onto it and press down until it is flush with the mold. This will make the excess plaster squeeze out. To make sure that the mold is aligned straight on the Styrofoam piece I use the trusty Legos as guides and line them up with the bottom edge of the Styrofoam. The finished result can be seen below in the red circle.
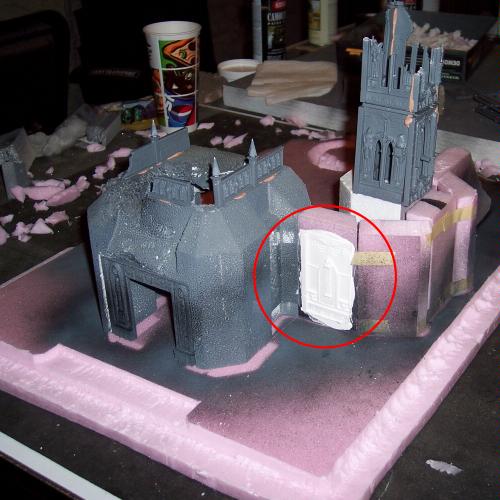
Then, as I added more walls in this fashion I just used the excess plaster to smooth out the transitions.
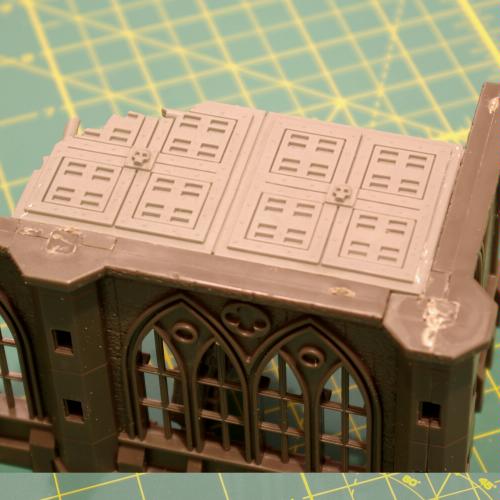
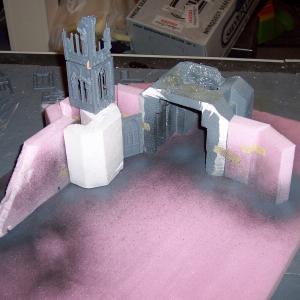
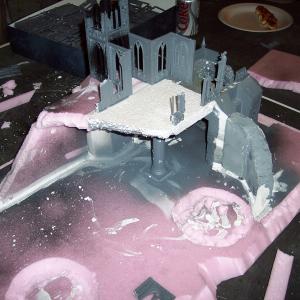
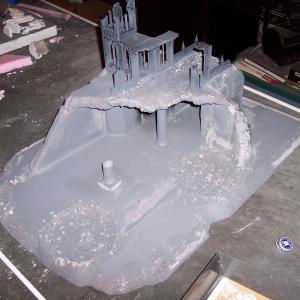
The Second Story
Once the bottom floor had been pretty squared away it was time to work on the second story. After adding some cut Styrofoam pieces to the top of the existing walls it was time for the next mock-up to get a better picture of what the finished product should look like. To support the recently added roof I used a pillar from a cake decorating set. This is a good time to eat some pizza too.
Finishing Up
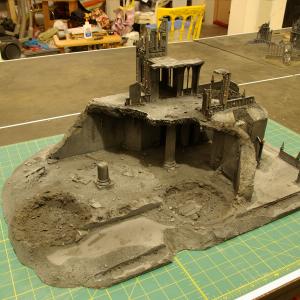
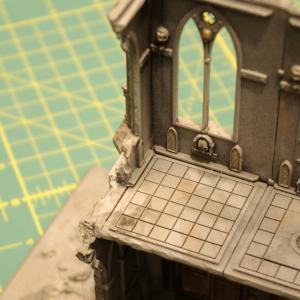
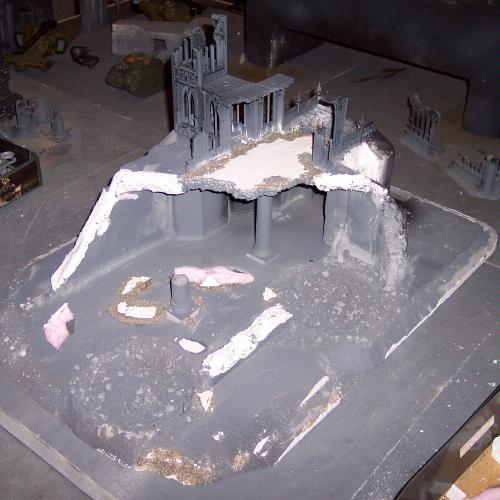
Satisfied with the way things looked I began adding some rubble to the base and I smoothed out some of the Styrofoam pieces using plaster. Once dried, I started spray painting the building. This was done in many MANY coats of very light spray. I’m sure there are some spray paints that won’t melt Styrofoam but the kind I use will if I get too rambunctious with it.
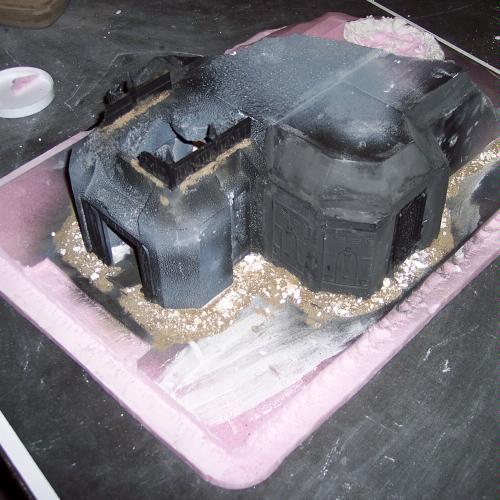
Adding the pieces to make the second story was decidedly easier since I used the GW COD pieces. Once they were in place I gave them a spray to match up with the rest of the building and added some more rubble to the ground floor.
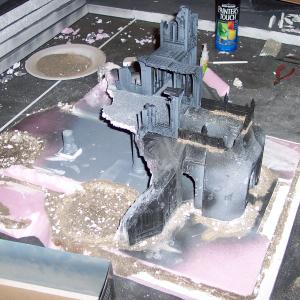
At this point I sprayed the entire terrain piece with some primer to find any obvious seams or cracks.
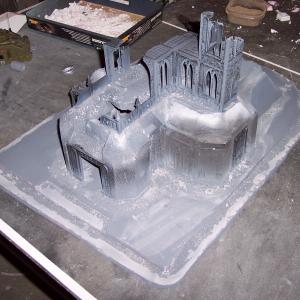
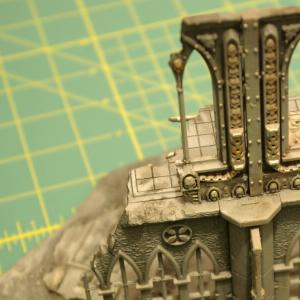
Since the floor of this thing looked way too clean I decided to messy it up. I added some more rubble which was a mixture of plaster, Styrofoam, dirt, and some of the broken pieces from the casts I made earlier. I also accentuated the broken sections of wall with a mixture of plaster and Elmer’s glue.
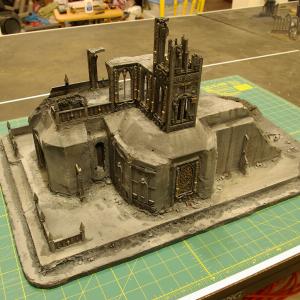
After adding a few more detail pieces and giving the piece it’s final paint job it stands complete. …finally!